WEEK2 MAKING A TORUS
first of all, I took my strip of aluminium and used the mould to bend the aluminium round and slowly start working the shape into the strip. The wooden template had a concave cut and when hammered using a nylon mallet, it will create the desired smooth curve.
Due to the inconsistent depth of the concave template, the template was marked at the deepest groove to ensure a consistency throughout the work-piece. Then use this bent T-shape mode and the flat head hammer to curve the two side down gently. I did this from the end of the torus, and fit the curve closely to the mode. The shape of torus changed easily so I have to work and check carefully.
The next step was to turn the strip around and start stretching the metal to create a ‘M’shape in the aluminium. The curve was produced from the middle through to each ends to ensure a smooth stretching flow. Use the planishing hammer and the bending steel to adjust the arc of the curve.
using the curved steel dolly, it helps to create a thin edge on two sides of the torus to add a little detail to the shape. the form of the edges should be made in sequence from inside to outside. Making the edge starting from the inner space of the torus to the outer side to make a regular shape.
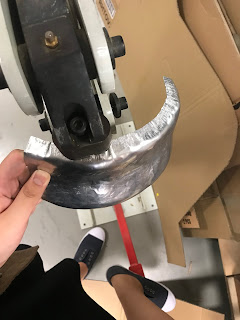
The final product


No comments:
Post a Comment