WEEK3 MAKING A TRAY
This part of the assignment is to create an aluminium skin to adhere to the contours of 2 trays in a group of 2.
Materials : Aluminum sheet, timber and circle temple, maker and ruler, hammer, polish tool

Use the Guillotine to cut the metal sheet to the right dimension, which is pretty much the size you want it to be the tray.


Start to mark out a 10mm gap from the edge of the aluminium. Custom made a wooden mould with round corners that can help shape the tray.


Adjust the size of the metal piece again according to the size of the template (about one centimetre smaller than the template around the edges), then cut the edge along the template.

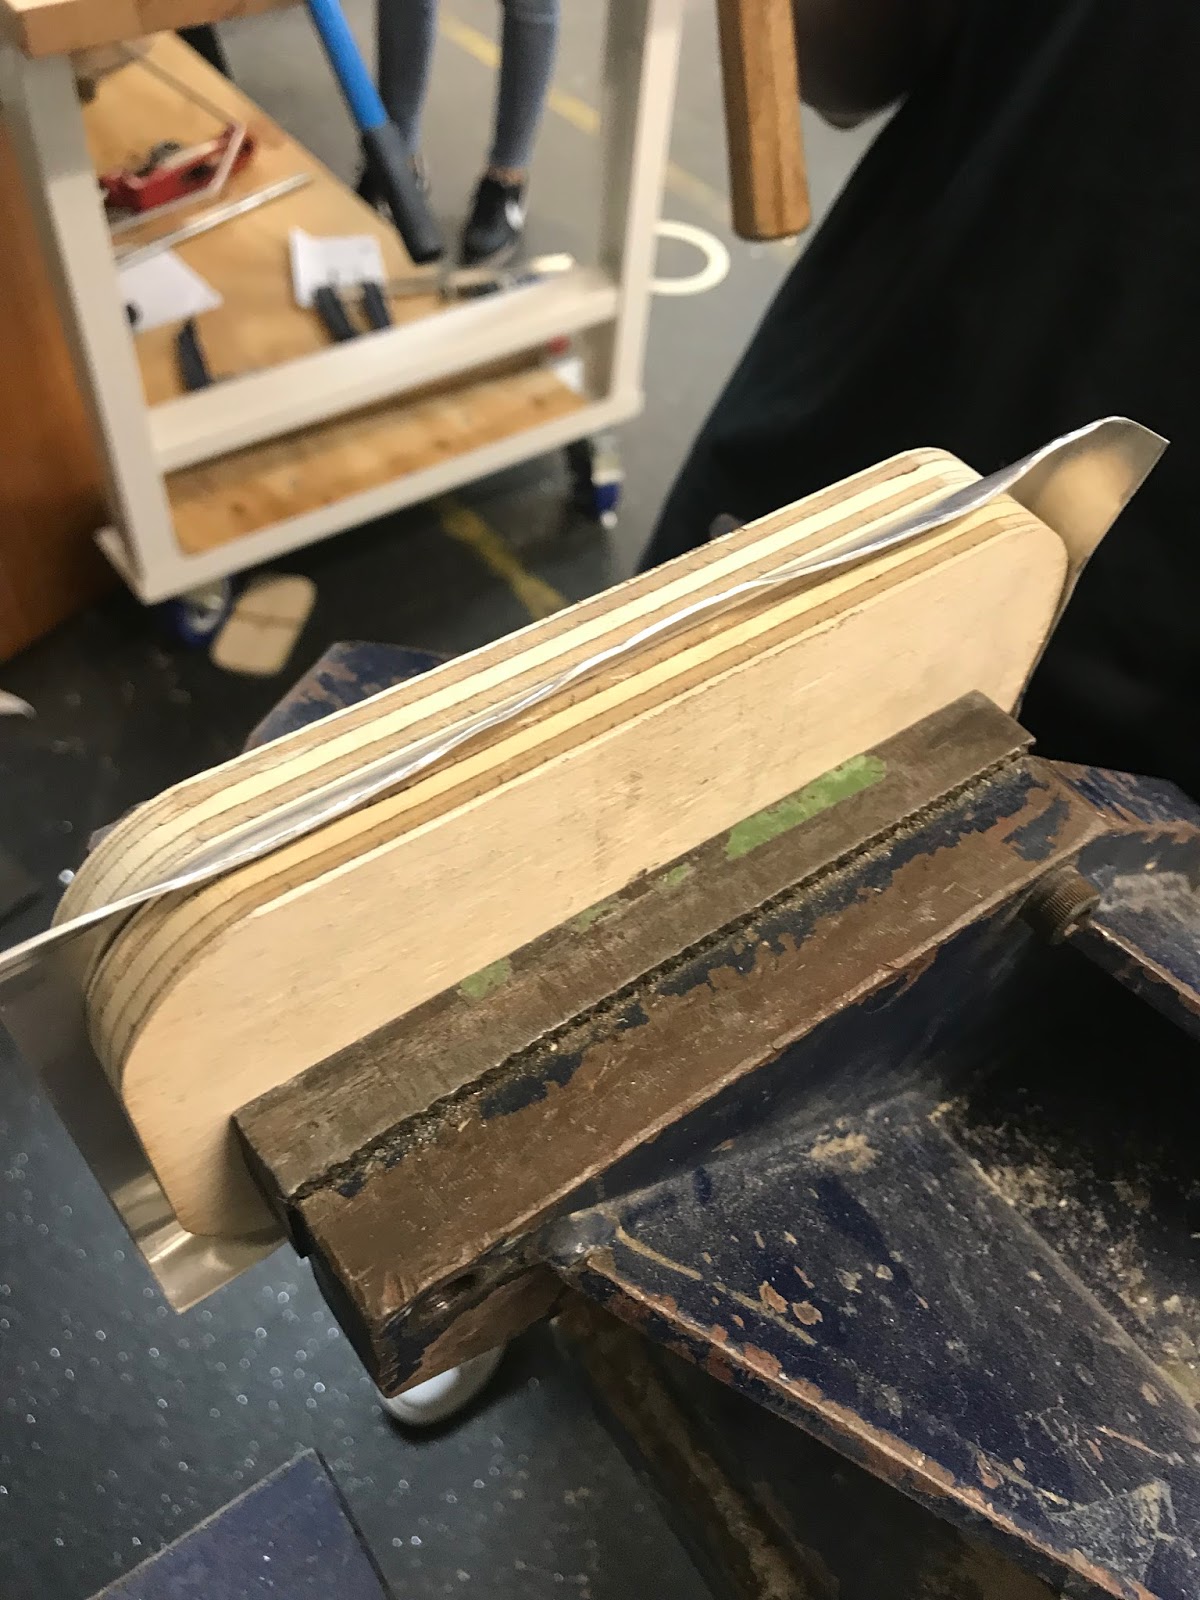
Stack the piece of aluminium and the mould together and clamp them tight, use a nylon hammer to shape the metal.
Then use the sandpaper or file to smooth the edges, and cut the uneven edges by pruners.
I was careful to use the curved weight, because the metal would buckle in the weights edge if hit too hard or at an incorrect angle. And the metal stretched when it was hit on the weight, I had to trim and file the edges slightly that it would be smooth and follow the same lines of the longer edges.
FINAL PROJECT


Match with group mate

Because we were using the same templet, my parter's tray and mine are pretty identical.


No comments:
Post a Comment