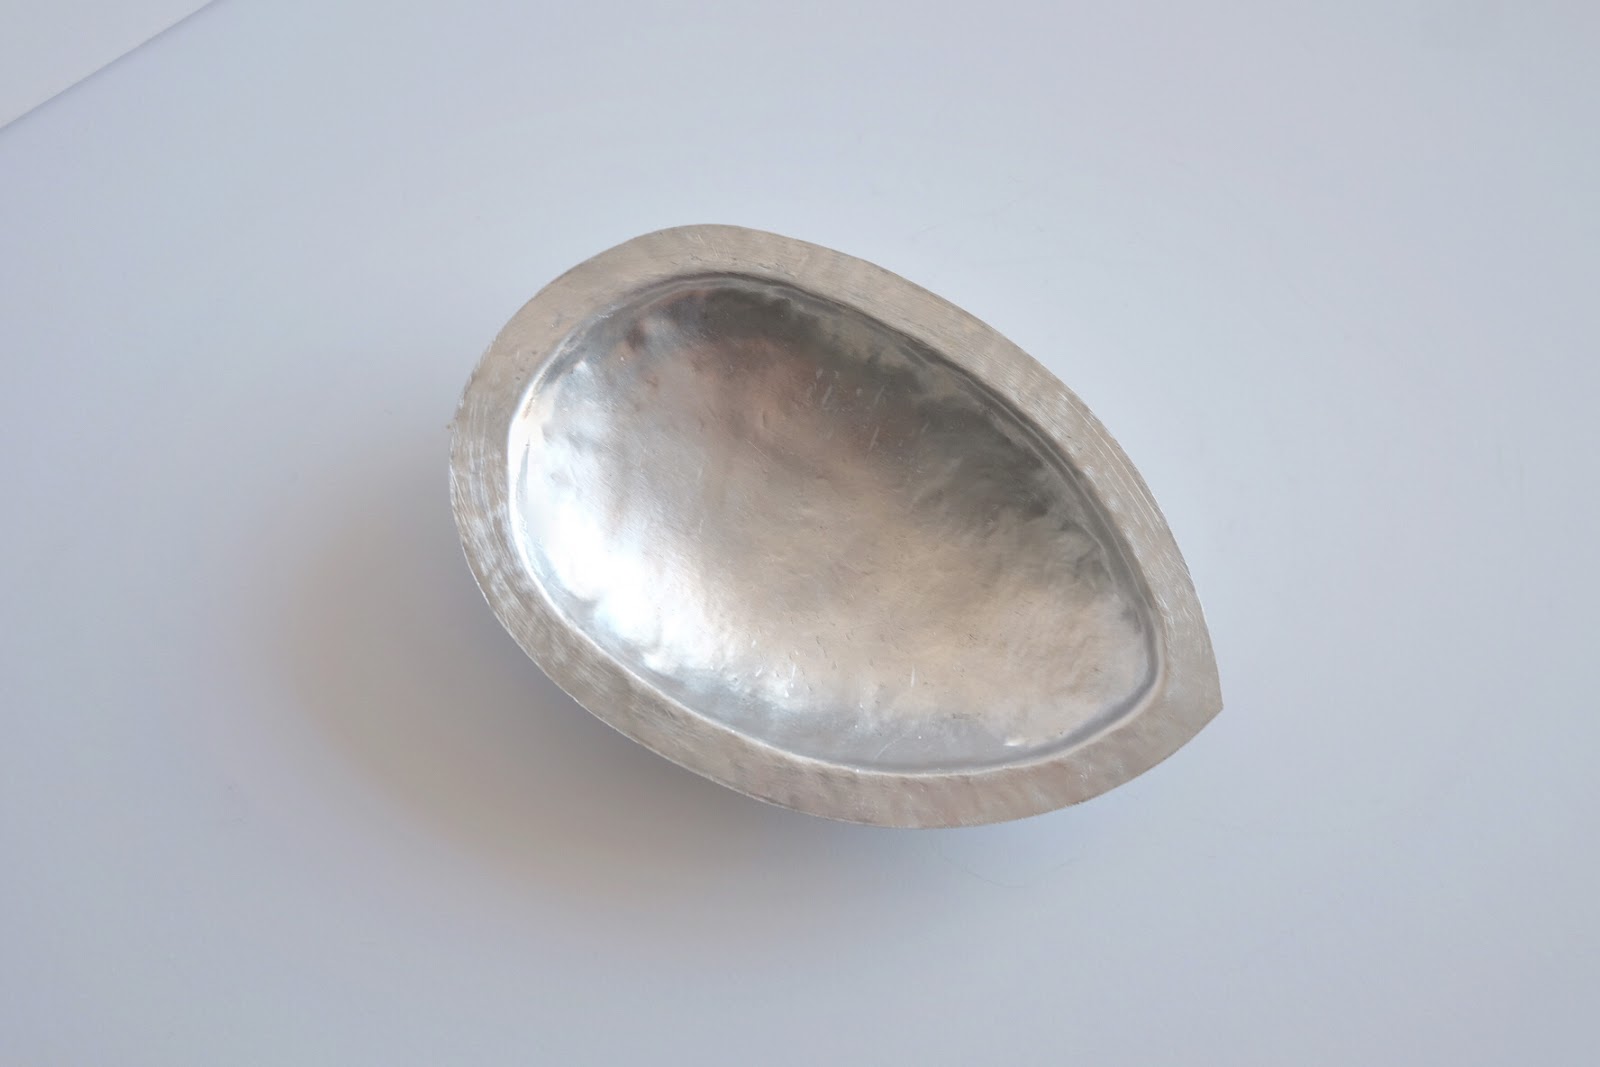
WEEK 4 MAKING A BLISTER
This part of the assignment is to create an aluminium skin to adhere to the contours of Blister.
Materials: Aluminum sheets 10mm, MDF sheets 12mm, Sandpaper, Bolts and washers. Permanent Marker.
Tools: CNC machine, Guillotine to cut the material evenly, Hand file, Tinsnips, Scribe, Spanner, Flat and tapered nylon hammer, Mallet, Planishing hammer.

Using the thick pre-cut MDF templates with already cut aluminium sheet place in the centre to create a 3D form with depth. The aluminium sheet and MDF are al set up, begin with gently hammering the edges of the teardrop with the round end of the nylon mallet. This will give light lines of the edges which will be further sharpened. (I forgot to take pictures)

To create more depth to the form once the lines are clearly marked, place nylon bossing mallet with round edge and begin hammering on the mallet using other types of mallets. This allows smoother surface and avoids any dents or tool marks.

Once the aluminium reaches its limit in getting any deeper, remove the top template to make it easier to shape.

To avoid dents and creases from hammering directly on the metal, making own metal shaping tool out of solid timber piece can maximise precision.

the hardest part was making the pointy edge of the water-drop shape thing. It was very hard to find a pointy object to reach that edge, while the object has to be hard enough to take the force from the hammer.

Use the file and sanders to smooth the edges of blister.
Final Project


No comments:
Post a Comment